Since purchasing my home just over two years ago I've struggled with decorating an area that is connected to the living room. I didn't have the furniture for the area and and wasn't sure what to do with it. Based on the Before picture you can see the space needed some TLC.
- Overcrowded table with pictures (I have two sisters and each had a baby in 2011 and one of them also got married. As you can expect my pictures doubled throughout the year)
- Photo books under the table.
- A basket full of newspapers
- Over sized and unused elliptical machine
- No wall hangings
I went to Lowe's and checked out some other stores for shelves I could hang on the wall. I didn't find anything I liked and they seemed pricey. I then decided to make the shelves myself and get the distressed look I like and goes with the rest of my house.
1. Purchased 3 1x10x4 pieces of wood.
2. Created stain by mixing apple cider vinegar and steel wool in an old jar and let it sit for a couple of days.
3. Painted all sides of the wood planks with white paint I had on hand from painting my kitchen cabinets. I basically slapped on one coat of paint since I was going to be sanding and staining in later steps.
4. Once the paint was dry I started beating the boards with s a hammer and screw driver on the edges and throughout the board. I even took some nails and staples and hammered their imprints in the board.
5. Once that is done sand the board. I sanded the edges down to no paint. Make sure to sand the entire board so the stain will stick.
6. Wipe the boards clean of any dust using a rag or old shirt. Then apply stain with a different rag or old shirt. Make sure and wear gloves you don't want the stain or the smell on your hands. Notice the white sticking out, it is because I didn't sand it good enough. When the stain was dry I re-sanded areas and wiped off any dust.
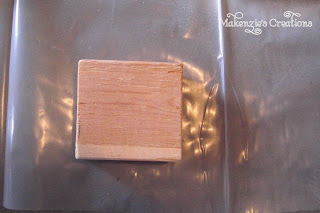
7. When dry maybe 30 minutes apply another coat of stain and repeat until desired color is achieved. I think I applied 3-4 coats. (picture below is after two coats of stain)
7. I then applied two coats of clear shellac. Wait until shellac is dry before applying additional coats, approximately 30 minutes. Notice all the dings that appear. I love the distressed look.
8. It was then time to hang the shelves. I couldn't decide how I want to hang them and then realized I need to arrange so the brackets would be attached to studs since I didn't have any anchors and I wanted to hang that night. I was too excited to wait! Tip: Cut painters tape the length of the wall and arrange on wall to see what boards will look like before drilling any holes in the wall.
Shelves are hung and decorated for Valentines Day. I am in LOVE with the shelves, but something is missing. The area is still to cluttered and the table and elliptical just aren't working for me.
Then the light bulb turned on, I MUST FIND a buffet table. So to Craigslist I went. I found a couple of different options, but still wasn't happy with the choices and heights of the buffets listed. I started looking at dressers. I found one listed and made the phone call it it was still available. The length was perfect. The depth was perfect. The height was perfect. Oh and the price...at $100 it was perfect too. I had planned on staining and distressing the dresser the same way I did the shelves, but the color works and I don't need to make any changes except for the hardware. Not sure what I'll do with the large matching mirror that came with it.
Project Cost:
3 Boards: $16
6 Arc Brackets: $32
White Paint: Free
Homemade Stain: $3
Shellac: $10
Dresser/Buffet: $100
What happened to the elliptical? I sold it on Craigslist within 24 hours of posting.


